5 repetitions · holds start at 2 seconds, building to 5 seconds
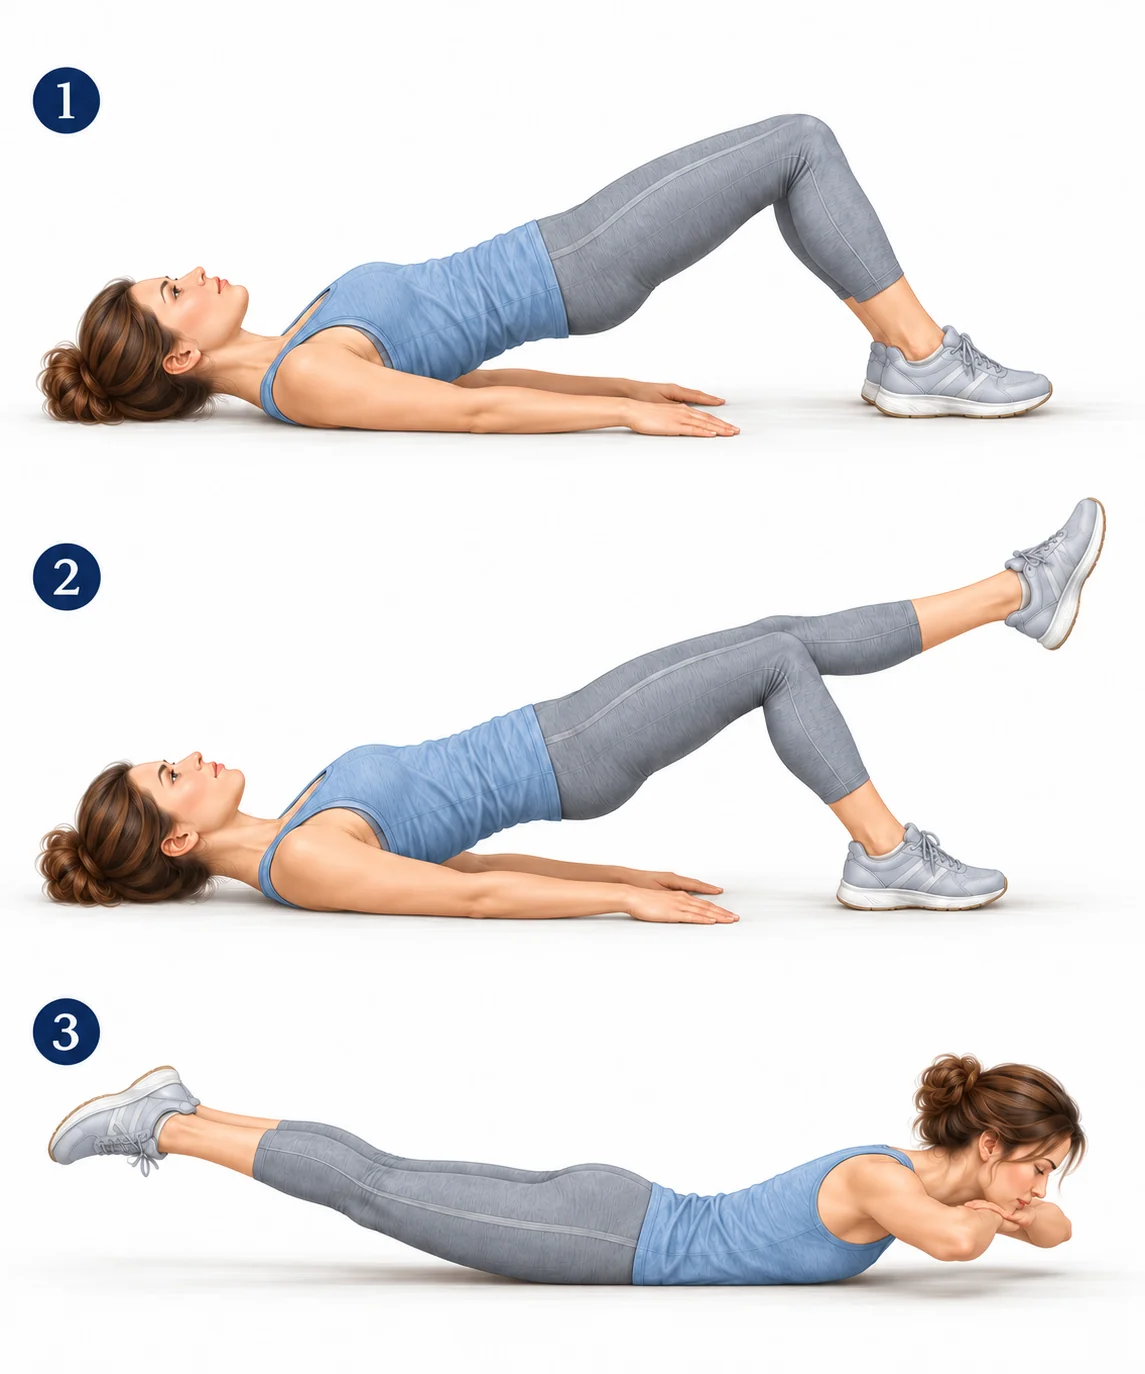
Lie on your back with your knees bent. Raise your hips off the floor until your hips are aligned with your knees and shoulders. Hold, lower and repeat.
ILLUSTRATION 02
Bridge with Knee Extension
Repetitions & holds
5 repetitions per side · alternate sides · holds start at 2 seconds, building to 5 seconds
Optional progression from the two-legged bridge. This can be a worthwhile progression: the bent-knee side helps stabilise the pelvis while the opposite leg is unsupported. Lie on your back with your knees bent. Raise your hips off the floor until your hips are aligned with your knees and shoulders. Extend your left knee making sure that the left side of your pelvis doesn’t drop or elevate. Hold, then return foot to floor. Perform on other side and repeat.
ILLUSTRATION 03
Prone Extension
Repetitions & holds
5 repetitions · holds start at 2 seconds, building to 5 seconds
Optional progression. Lie on your stomach with hands under your chin. Lift your upper body and legs to a comfortable end range, allowing your neck to extend comfortably without forcing. Hold, lower and repeat.
02 / Stabilising Exercises
Hands-and-knees sequence
Match each numbered illustration to its instructions.
5 repetitions per side · alternate sides · holds start at 2 seconds, building to 5 seconds
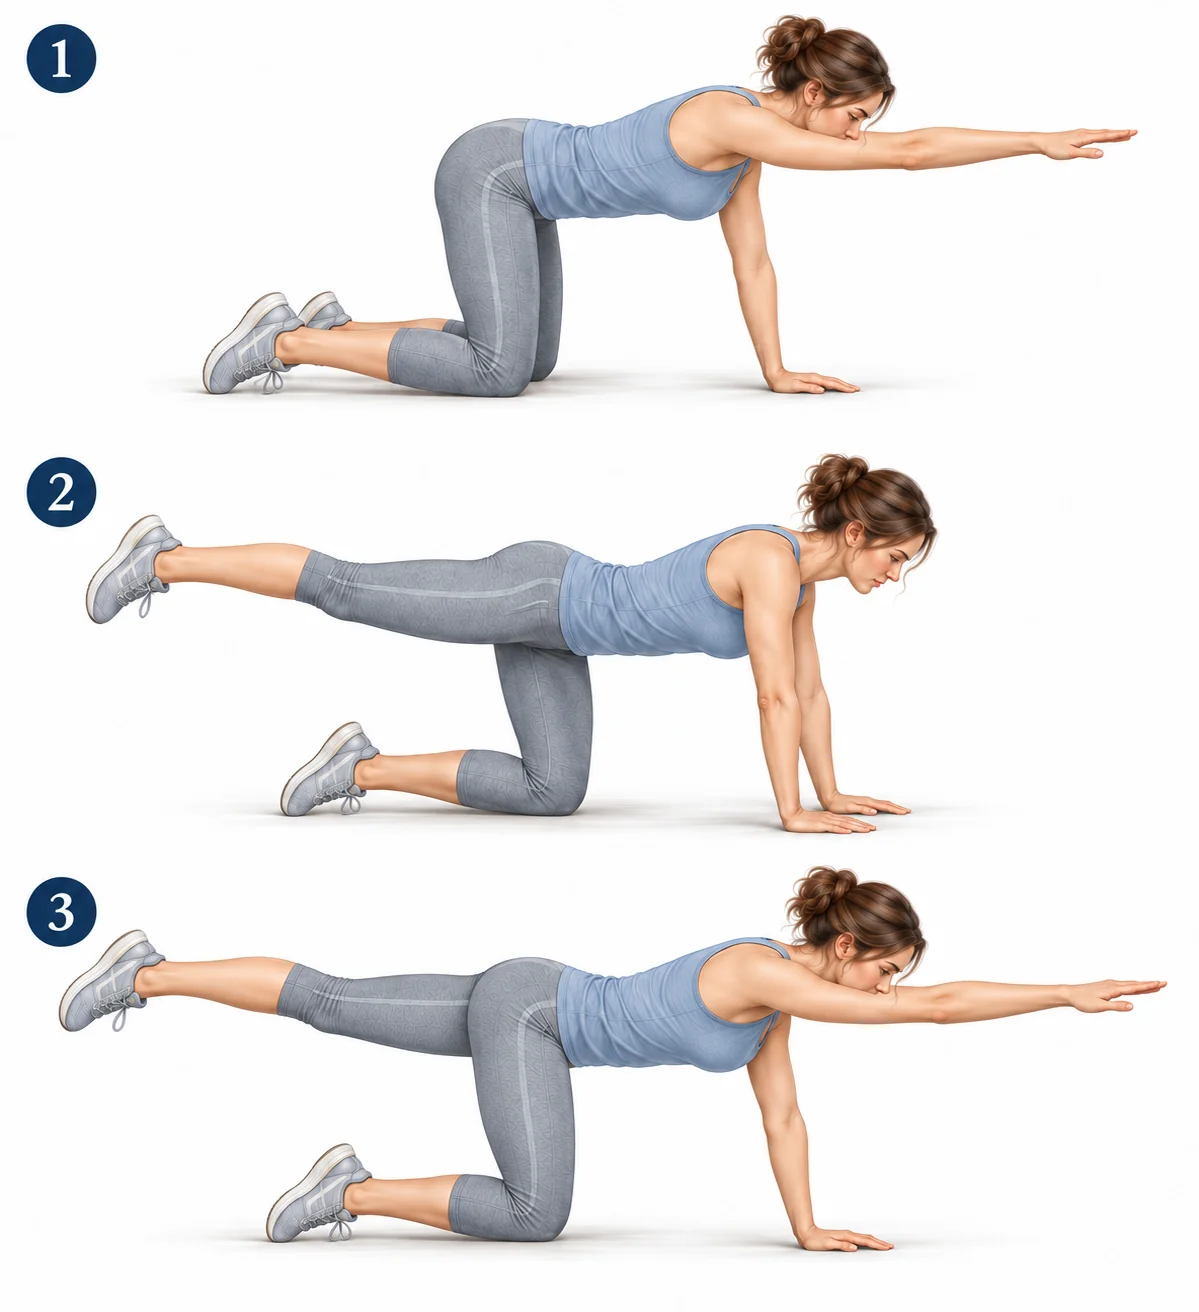
Quadruped: Start on your hands and knees. Place your hands directly below your shoulders, and align your head and neck with your back.
From all fours, keep your trunk steady and parallel to the floor. Raise one arm towards parallel with the floor, staying within your comfortable range of movement. Hold, then return your hand to the floor. Perform on the other side and repeat.
ILLUSTRATION 02
Quadruped: leg raise
Repetitions & holds
5 repetitions per side · alternate sides · holds start at 2 seconds, building to 5 seconds
Quadruped: Start on your hands and knees. Place your hands directly below your shoulders, and align your head and neck with your back.
Raise your left leg to pelvis height within a comfortable range, straightening your knee during the lift. Hold, then return your knee to the floor. Perform on the other side and repeat.
ILLUSTRATION 03
Quadruped: opposite arm and leg
Repetitions & holds
5 repetitions per side · alternate sides · holds start at 2 seconds, building to 5 seconds
Quadruped: Start on your hands and knees. Place your hands directly below your shoulders, and align your head and neck with your back.
Optional progression. If you can, raise your right arm and your left leg at the same time. Hold, then return hand and knee to floor. Perform on other side and repeat.
YOUR NEXT STEP
Explore another optional group.
Basic core exercises offer further options, with support that can be adapted to your starting level.